
In this tutorial I explain how I have done the Ogryns for my Imperial Guard Army using Warhammer Fantasy Battles Ogres. I'm sure that if you search the Internet you can find other ways to do it.

For this tutorial you would need:- WFB Ogres (body, arms heads)
- The knives from the WFB ogres box.
- The buckles from the gut-plates.
- The Binoculars from the heavy weapons squad.
- Some pieces of sprue.
- Two pen cartridges or some round plasticard.
- The cap from a pen with a cylindrical section.
- Some wire or some paperclips.
- Some modelling putty.
In the tutorial I made my own riper guns but it also possible to use some heavy shoota from the orks or other big weapons.
We need to cover the hole in the Ogre's gut. We start by trimming off the border around the gut with a hobby knife.

Now we glue a piece of sprue inside the hole to safe on putty. We make a round piece of putty and put it on top of the sprue. When the putty is cured, we knead more putty and putty on top of it and shape it in the likes of the trouser, the belt and the abs. Before the putty cure be cut a buckle from a gut-plate and place it on top of the belt.

Now the Ogryns should have some military boots so we have to change their feet. I try to make some reinforced boots but the results weren't great.

One of the arms is going to carry the riper gun and the other whatever I came up with at the moment. It is possible to change the position of the ogre's arms but is difficult and it requires the use of putty and sculpting muscles, so I'm going to change only two of them.
I add a knife in one of the arms that doesn't carry a riper gun. To do if I cut the sword that came in the hand and also the little plates. Later I fixed the blade of a knife drilling a hole in the hand and in the blade and using some wire inside.

In other arm I left an Iron-fist without changing anything.
I changed one arm so it would look like it was throwing a grenade. The process was to make the arm pieces cutting off some of the muscles and rebuilding it with some putty. For the grenade I just put some putty on top of the weapon handle. The shape of the grenade isn't great but it looks like a grenade.

For the last arm that isn't carrying a riper gun I modified the arm from the bellower so it could carry a pair of binoculars.

To fix the arm I had to cut the part of the shoulder in the body so the binoculars were place in front of the eyes. In the arm I cut the a little bit the arm pit and the thumb and sculpted them from scratch.

I didn't modify the position of any of the arms for the ripper guns. As I said at the beginning of this tutorial I made my own ripper guns. I started by cutting the weapons of a hand. Next I cut a section of empty pen cartridge of about 2,5 cm (around one inch) and I glued it o the hand. Later with some putty I reinforced the union between the pen cartridge tube and the hand. Using a section of a pen cap and a section of the pen cartridge I made a mold with the shape for the rounds clip of the ripper gun.


After that the Ogryn were a little too boring so I decided to add some details. I made a cigar for one of them with some putty (pretty easy staff). I made a cap for other one. I also made a t-shirt for the Bone 'ead and two should pads.


After all this work I got this:


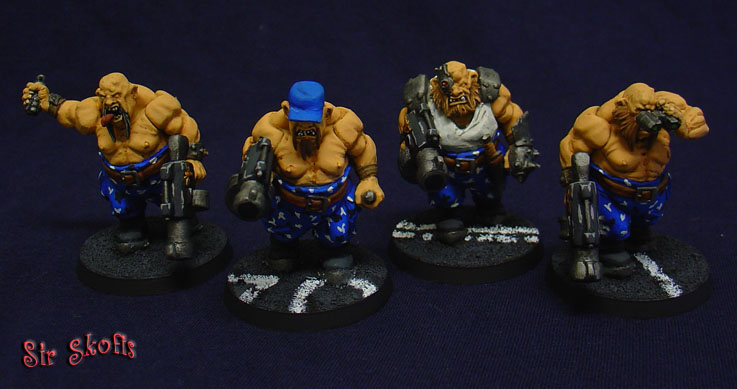


I didn't really like the look of the Bone 'ead so I changed his shoulder pads and add a beret to it.


No comments:
Post a Comment